Search This Blog
Showing posts with label V-ray for Sketch up tutorial. Show all posts
Showing posts with label V-ray for Sketch up tutorial. Show all posts
Wednesday, November 23, 2011
VFSU COMPLETE RENDER PROCESS TUTORIAL (Beginner)
Here is the tutorial for V-ray rendering Beginner
Enlarge this image Click to see fullsize

1.- INTRODUCTION (CORRECTED)
hotfile.com 1.-_INTRODUCTION.wmv.html
2.- ILLUMINATION PART 1
hotfile.com 2.-_ILLUMINATION_PART_1.wmv.html
3.- ILLUMINATION PART 2
hotfile.com 3.-_ILLUMINATION_PART_2.wmv.html
4.- ILLUMINATION PART 3
hotfile.com 4.-_ILLUMINATION_PART_3.wmv.html
5.- MATERIALS PART 1
hotfile.com 5.-_MATERIALS_PART_1.wmv.html
6.- MATERIALS PART 2
hotfile.com 6.-_MATERIALS_PART_2.wmv.html
7.- MATERIALS PART 3
hotfile.com 7.-_MATERIALS_PART_3.wmv.html
8.- MATERIALS PART 4
hotfile.com 8.-_MATERIALS_PART_4.wmv.html
9.- POST PRODUCTION PART 1
hotfile.com 9.-_POST_PRODUCTION_PART_1.wmv.html
10.- POST PRODUCTION PART 2
hotfile.com 10.-_POST_PRODUCTION_PART_2.wmv.html
How to manage Shadow | Sun and Sky...
i made a simple test rendered scene and tutorial on how to manage the scene environment and illumination by adjusting the value of Turbidity | Ozone | Intensity | and Sun Size which you always use in your scene especially exterior.
CHECK ALSO - HERE
TURBIDITY

OZONE

INTENSITY

SUN SIZE

Tips and Tricks : if you use physical camera, you are going to reduce all the exposure of the other lights that you have in your scene and it's good idea to reduce the intensity of the sun if you already have all the other lights in the scene.
CHECK ALSO - HERE
TURBIDITY
OZONE
INTENSITY
SUN SIZE
Tips and Tricks : if you use physical camera, you are going to reduce all the exposure of the other lights that you have in your scene and it's good idea to reduce the intensity of the sun if you already have all the other lights in the scene.
Monday, November 21, 2011
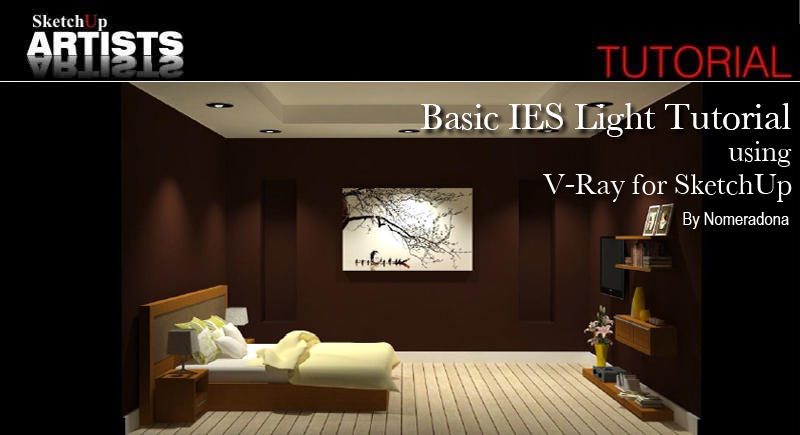
Basic IES Light Tutorial using V-Ray for SketchUp
Basic IES Light Tutorial using V-Ray for SketchUp


By Nomer Adona
I am writing another IES lighting tutorial again showing the basic steps in using V-Ray for SketchUp 1.48.90 and future releases. Previously I had used 1.48.66 in my first IES tutorial, IES Light Tutorial using V-Ray for SketchUp but there seemed to be a few little bugs with that particular updated version. ASGVIS (now owned by Chaos Group) made a tremendous leap, and I can really conclude that their newest build is much more stable and easier to use. I planned to use the same file that I used with the first tutorial, but I have decided to just model a quick one for this new tutorial. I am using here also a photometric data name 6B3_(100A19).ies that I have downloaded for free fromLithonia, or SketchUpArtists Download Section and found under Tutorial Files.
In this tutorial, a special thanks to my friend Trang An. I am using some of his excellent components here for the purpose of seeing the overall effects of the IES lighting, instead of just using a simple room. In this tutorial, my materials have no reflections, bump etc (except for the receptacles) for quick rendering but later I will supply you hopefully with another tutorial on how to play with materials. Anyhow lets get started this tutorial.
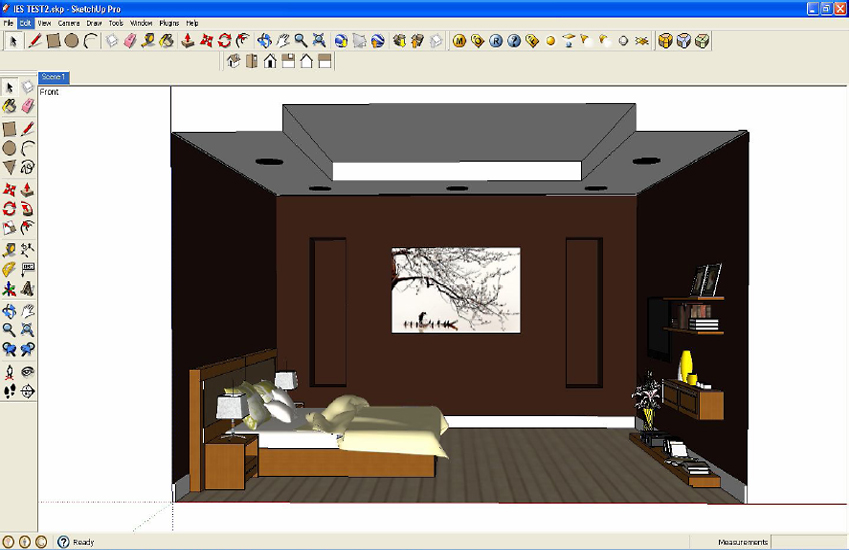
1. SketchUp set up. Basic model and components.
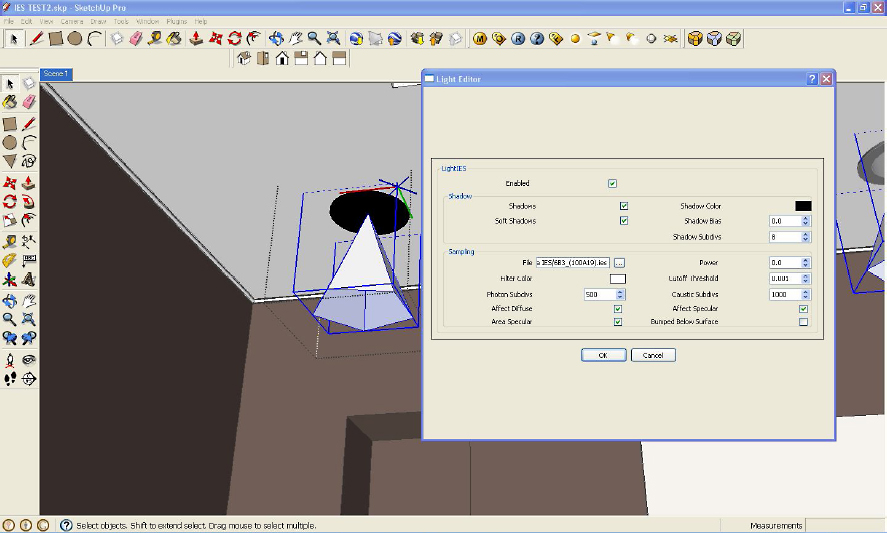
2. I have created a simple recessed light and made it into component. Then, I copied this component into 4 more instances. This is a good tip, so that when you place the V-Ray lighting; automatically you will have an instance of this lighting. This is the same when editing your V-Ray light, you will only edit one light inside this component, and the other lightings will be edited automatically. In the following image, I created V-Ray IES lighting, scaled it a bit and placed it below the receptacle.
3. Then I clicked the IES light icon. Another menu box appeared (see below). Then under sampling (File) I clicked the box and browsed the IES photometric data (6B3_(100A19).ies. By default the power is set to 0. Even with this, V-Ray SketchUp will read the photometric data.
In my opinion, using V-Ray sun and V-Ray physical camera is not necessary when rendering an enclosed space. This is advisable especially for beginners. The reason is, you don’t have to spend a huge amount of time in balancing the sun and the physical camera. V-Ray physical camera works together with the V-Ray sun, which is really a very strong light. The V-Ray physical camera acts like a counter balance in correcting the exposure of the image, much like an actual photo camera – where ISO, aperture size and shutter speed enable to control the exposure. Again in this tutorial, the V-Ray physical camera and the V-Ray sun were both turned off.
Here is the render.
The above render is already showing the effect of the photometric lighting. On the other hand, I would want to see two things – the light source showing some lights and secondly I would like to increase the power of the IES lighting.
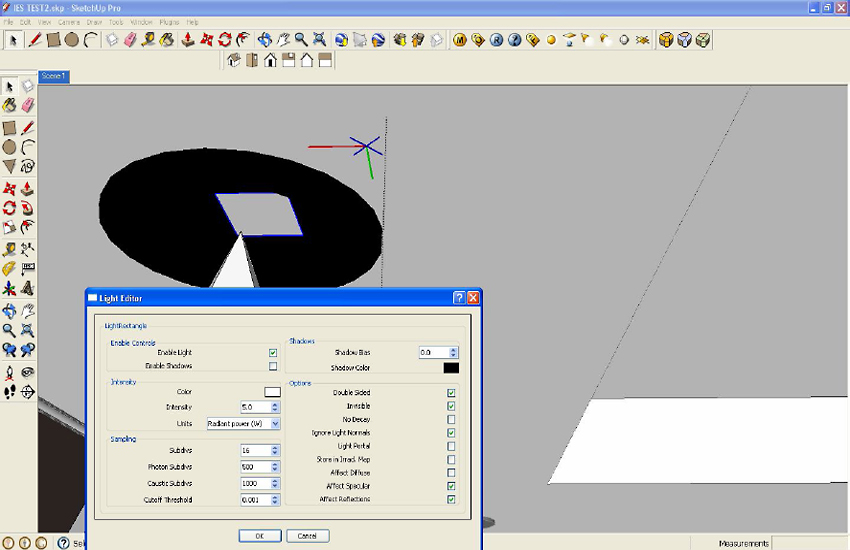
5. To achieve the first one, I am putting another rectangular light inside the receptacle to simulate the light source. The intensity of this rectangular light is small. I enabled the light, turned off the shadow, made it invisible and double sided. Below is the screen grab of my rectangular light settings.
Here is the render. Now the light source is showing on the receptacles.
To solve the second problem, I simply increased the multiplier of the IES light. Here I used power = 7000. Below is the render.
6. If you want to change the color of the IES light, you can do it by putting color to the filter
color. Below I used warm yellow.
Now it’s up to you how you will do the next step. I hope this small tutorial did manage to clear up some of the confusion in the first IES tutorial.
Subscribe to:
Posts (Atom)


